
Organizing a Craft Room Using the IKEA PAX System and Creative Storage Supplies
- Tara M Stewart

- Dec 18, 2025
- 5 min read
DISCLOSURE: THIS POST CONTAINS AFFILIATE LINKS, MEANING I MAY GET A SMALL COMMISSION IF YOU DECIDE TO MAKE A PURCHASE USING LINKS PROVIDED. HOWEVER, THERE IS NO COST TO YOU. AS AN AMAZON ASSOCIATE, I EARN FROM QUALIFYING PURCHASES. VIEW THE FULL DISCLOSURE HERE
If you’re a crafter, chances are you’re also a collector of craft supplies.
When supplies are scattered, buried, or stuffed into random bins, creativity shuts down fast. Instead of feeling inspired, you feel stuck.
In today’s blog, we’re sharing how we used the IKEA PAX system to create a beautiful, organized crafting space. The finished result looks custom but costs a fraction of custom built cabinetry. In addition, we will show you what organizing products we selected that not only worked perfectly inside the PAX system, but also matched our client’s specific crafting needs AND she can repurpose if her needs change.
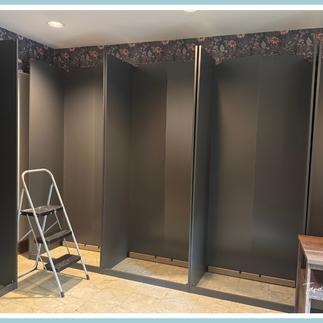
Oh and to get you excited to read on, check out the pictures below to see the IKEA PAX system coming together, from install to organized finish.


IKEA PAX Planning Services, What You Need to Know
One of IKEA’s best kept secrets is their free PAX planning services, available both in store and virtually, with a wardrobe planning expert. Yes, IKEA technically calls PAX a wardrobe system, but we’ve used it in garages, laundry rooms, home offices, and craft spaces. Don't let the name fool you!
While you can design the system yourself, working with an expert helps you avoid mistakes and makes sure you’re using the space as efficiently as possible.
To get the most out of your planning appointment, make sure you go prepared. Be sure to have:
Accurate measurements of your space, including ceiling height and where outlets are
A plan for whether shelves, drawers, or a mix makes the most sense
Thoughts on open storage versus baskets or drawers based on how you actually craft
A decision on doors and lighting
When you take time on the front end it allows you go to IKEA prepared. Which means you get the most out of your IKEA planning session and a system designed specifially for YOU and YOUR space.
Quick note, our client worked directly with an IKEA PAX planning representative to select the cabinet layout and color. She also recruited her dad to help with the install, so major props to both of them for bringing this system to life. While our team help declutter and pre-plan as well as set up the final organization, I must give credit where credit is due.
Now let’s rewind to what we did before our client even headed to IKEA.
Step One, Declutter the Craft Supplies First
This basement had slowly turned into a catch all space. While there was a traditional storage closet, it was unfinished and better suited for holiday decor than delicate craft supplies.
So we did what we always do first. We gathered every single craft related item from around the house and brought it into one place. You can sort your piles into anything, bags, old Amazon boxes, extra totes, whatever works. The goal at this stage is to get like with like.
Once everything was grouped by category, it became much easier to see what she actually had, what she still used, and what no longer served her. That’s when we purged and donated the items she no longer wanted or needed.
After the purge, planning the space became easy. We could see how much she had of each catogory and plan not only for the right size storage containers BUT for the right style IKEA PAX system.
Pro tip, always plan for future purchases. Crafters love crafting, and they also love buying craft supplies.
Local Donation Tip for Lexington Crafters
If you’re in Lexington, we highly recommend donating craft supplies to Lexington Center for Creative Reuse. They are a nonprofit creative reuse store that offers classes, events, and a HUGE HUGE amount of donated materials for purchase on a sliding scale.
In addition, to keep supplies affordable, teachers can even apply for material grants for classroom projects. Head here for their store hours and donation information.
Designing the IKEA PAX for This Craft Room

Here is a picutre of the finished cabinets, because I just couldn't wait to the end to show you.
After the declutter, purge, and piles of supplies were catgorized, we knew she needed:
Shelves, lots of them
No drawers needed since we planned to use versatile organizing containers
The deepest PAX option at 22 inches, perfect for craft bins we planned to use
Doors and lighting to create a calm, finished look since the cabinets are in a prominent basement area
With the cabinet structure set, it was time to choose the organizing products.
Step Two, Select Organizing Products
Michael’s has great craft specific storage options, but we intentionally chose products that could be repurposed for other uses if her interests shift or she enters a different season of life.
Here are a few of our favorites from this project.

The Home Edit Clear Plastic Storage Bins With Dividers
Each bin includes one removable divider, and you can purchase additional dividers separately to customize each tote.
For this project, we used:

They also have a 70 Quart option if you need something bigger.
Why we love them:
Stackable design with raised lids and snug bottoms
Secure clips keep items contained
Adjustable dividers let you break large categories into smaller subcategories

One of the great things about these bins is that you can purchase MORE dividers! Which for this project was a HUGE win. I have not found the dividers in the store but you can order them directly from Walmart and I have linked the various packs of dividers below.
By dividing items within a single bin, you subdivide a large catgory into subcategories with that bin. You can learn more about this product on our blog Organize your Storage Space with Divided Storage Bins from Walmart

Turntables From Unexpected Places
The Brightroom divided bathroom turntable from Target works beautifully in craft spaces. If it’s good for lipsticks and eyeliners, it’s also great for journaling supplies and small tools.
You can see we used two inside the smaller cabinet as well as one of the 17 quart divided containers from Walmart.
Pro tip, always check the bathroom section for organizing inspiration.
Keepsake and Scrapbook Storage Boxes
For paper based crafts, look for products that are acid free, lignin free, and PVC free.
We love the Pioneer Jumbo Scrapbook Storage Box,* which easily accommodates 12x12 scrapbook paper and supplies.

Small Clear Drawer Units
The Sterilite three drawer countertop units worked well for construction paper and smaller supplies she already owned. PLUS she already had these containers on hand, and we are a big fan of "if it ain't broke don't fix it.".
I don’t always love these, but organizing is about using what works, not forcing perfection. These were affordable, stackable, BPA free, and did the job beautifully.

The Real Goal of Craft Organization
Creating a good craft space is about making it easier to sit down and actually find what you need for a project! When everything has a home and supplies are easy to see and access, creativity flows more freely and frustration fades.
Perfer video? Head HERE to our Instagram video on this project!

Ready to Create a Craft Space That Actually Works?
If your craft supplies are taking over closets, spare rooms, or your sanity, we can help.
Whether you need help planning a system, decluttering what you have, or organizing a space from start to finish, our team is here to walk alongside you with zero judgment.
Head to our website and fill out the contact form to get started.

Comments